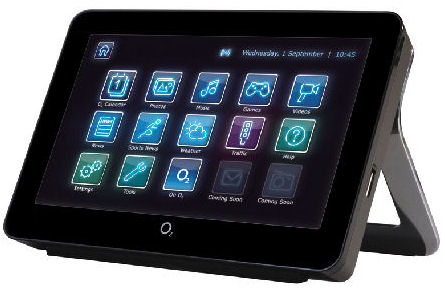
I purchased an O2 Joggler on ebay to replace the squeezebox in the kitchen.
Out of the box this tablet has a calendar, can play music, video and pictures from its internal 1GB memory or usb storage, listen to internet radio, view the weather, check traffic, play games or catch up on the news. It has a 7-inch touchscreen
The Joggler is always on with no battery and can connect to the internet via a wireless or wired connection. It has built in speakers or can output sound via a headphone jack.
Hardware
Based on Intel’s Poulsbo/US15W mobile chipset.
CPU: 1.3GHz Intel Z520 Single-Core, Hyper-threaded, Atom CPU
Chipset: Intel US15W (400/533MHz FSB)
Graphics: Intel GMA500 (with hardware acceleration for H.264, MPEG2, MPEG4, VC1, WMV9)
Storage:
- 512MB RAM (NOT user upgradable – not easily anyway)
- 1GB internal filesystems (soldered, non removable)
- 1MB EFI bootloader and nonvolatile parameters (socketed)
Network Features:
- Wired Gigabit Ethernet. Realtek RTL8111C
- WiFi B/G/N based on the Ralink RT2870 chipset (connected to the internal USB port).
Audio:
IDT STAC9202X5 Audio with 2 speakers and a 3.5mm headphone jack
USB (High Speed USB 2.0 Ports):
- 1 x external.
- 1 x internal (+2 with soldering).
Power: 5v DC
Screen: 7in Sharp LQ070Y3LG4A 800×480 LCD, 16m colour (24-bit), LED backlit, capacitative touch-screen
Size: 180 x 130 x 115mm
Weight: Approx 650g
Power Usage
1.24A/6.2W during startup
1.09A/5.4W with the clock on screen set at lowest brightness
1.40A/7.0W with the clock on screen set at Highest brightness
Original Operating System
The native OS is based around the Ubuntu-2.6.24-19.37 lpia kernel, running Busybox and Xorg with a proprietary front-end written for O2 in Flash by OpenPeak. This front-end is in turn based on OpenPeak’s own OpenFrame platform.
Pimp it
I only saw this after I had already done some work to enable telnet and install some other programs but this is by far the easiest method although I will also include the other methods later for completeness.
P’n’P for Joggler enables your Joggler to run many new apps such as a mobile webbrowser or the Squeezeplay Webradio Software from Logitech. All you need to do, is download the file, extract it to a usb key, plug it into your joggler and reboot it.
The script will automatically install telnet, ssh and scp access to your joggler!
When the script has completed its work, you will see the o2 menu again and should have a new message in your inbox.
You will find a new webserver installed on your Joggler, which you can reach using your computer and a webbrowser and typing
“https://IP-ADRESS-OF-YOUR-JOGGLER“
The webinterface offers you many useful features, like the possibility to install, uninstall or update apps and tools on the Joggler. It uses the Joggler’s message feature for notifications, that tell you, if a install or uninstall operation was successful.
It also checks online everytime, if your webserver version is up to date. If there are updates available, it will indicate this on the home screen!
Furthermore, the webserver gives you the ability to control things like the display timeout or brightness or to run apps or browse files.
The whole system is upgradeable over the internet, so you just need to install the Base Package once from USB!
Download:
Remember to extract the zip file to the root of your usb key!
Ubuntu
Installed a version of Ubuntu onto a memory stick. This runs entirely from the stick so it doesnt mess up the original OS at all. Although I have done it I am using the standard menu with PnP added as its a much simpler and cleaner interface for what I am using it for currently which is mostly squeezebox.
- Ubuntu 11.04 (Natty) (Joggler Image v1.0 – 01/05/2011):
Download the Btrfs Compressed Version (1.2 GB).
Download the Btrfs Version (1020 MB).
Download the Ext4 Version (993 MB).
I downloaded the Btrfs version.
Download Win32DiskImager from httpss://launchpad.net/win32-image-writer/0.1/0.1. Then unpack the .img.gz file using something a tool like 7-zip or WinRAR. Run W32DiskImager.exe, and select the unpacked .img file. Choose the drive that corresponds to your USB stick and use “Write” to write the image.
Booting from USB
Insert the USB stick into your Joggler, and turn the power on. It should boot to the Desktop . If you need to run a command with root privileges use “sudo”. The default user and password if/when requested for certain tasks is:
User: joggler
Pass: joggler
You can (and probably should) change this password at your next convenience, either using the Gnome user management tools or from a terminal using “passwd”.
Interference / pops / clicks in audio output
Some Jogglers seem to be more susceptible than others to audio crackles/glitches when switching to the higher power saving cstates. The hardware supports cstates 1, 2, 4 and 6 although 6 causes audio problems on all Jogglers so by default it is limited to 2 (4 on older images). However if you still hear clicks / pops or other interference in the audio, then you can use one of the following methods to fix it (by restricting the power saving modes the CPU can enter).
Open up a terminal windows and type
sudo nano -w /boot/grub.cfg
Find the line that has “splash” in it, and add one of the following additional parameters to the same line. Try the first one, reboot and if it doesn’t fix the problem then try the second, then the third one.
- intel_idle.max_cstate=2 (default on newer images)
- intel_idle.max_cstate=1
- intel_idle.max_cstate=0 idle=halt
Use ctrl+o, then enter to save the file and ctrl+x to quit the editor.
The first parameter limits the cpu to maximum of cstate 2. When idle, the joggler Atom cpu will run cooler and use less power if it can be in a higher cstate. The second parameter sets a maximum of cstate 1 and the third line disables the intel_idle module from managing cpu cstates and tells the kernel to use “halt” for cpu idling. Hopefully the first option should work which is the preferable one.
Right mouse button / secondary click from touchscreen
For a right-mouse click press and hold the touchscreen. The mouse pointer should “fill” and then the context menu should show for example. If for any reason this doesn’t work, go to the “Assistive Technologies Preferences -> Mouse Accessibility” and turn the “Simulated Secondary Click” off, then on again. You can also adjust the delay from these settings.
Overheating / Throttling issues
The Joggler has problems with the cpu throttling when the temperature reaches 70°C making the system pretty unusable. Previously there was only one option when it comes to the CPU throttling and that was to add a better heatink or cooling. An unmodified Joggler, after being powered up for some time seems to idle at around 60 – 66°C with the LCD on (less with it off), so it doesn’t take a lot of usage to bring the temperature up to 70°C at which point the throttling starts. By increasing the throttling trip point, the device becomes much more usable for longer periods, and for many tasks, doesn’t throttle at all.
Note if you make the changes below you are allowing the machine to run hotter than it is set to run by the firmware. You could permanently damage your device by playing with the thermal trip points. Do this at your own risk!
Boot up the image and enter a terminal and type.
sudo nano -w /boot/grub.cfg
At the end of the line that contains “splash” add the parameter “thermal.psv=xx” where xx is the trip point you want for the passive cooling (throttling) – for example to increase the passive throttling point to 80°C use “thermal.psv=80”. This means that your machine will not start throttling until it reaches 80°C rather than 70°C. It is possible this could shorten the life of your device.
General performance and tweaking
This image is a full/base install with nothing taken away, and a couple of additions (currently chromium, the florence on-screen keyboard and the xinput calibration tool). As such it has plenty of things you might not want/need. You can speed up the booting, by removing services and applications you don’t require (and free up some space). For example you might want to remove OpenOffice or the Gimp. Also check out the Startup Application in the control centre for example. There are also some system services such as AppArmor that you might want to remove.
Easystroke
Easystroke is an excellent “gesture input” application. Due to the difficulty in doing window moves on the touchscreen, You can install easystroke with
sudo apt-get install easystroke
Documentation and more information is available from the easystroke website https://sourceforge.net/apps/trac/easystroke
Enabling Telnet
Install PnP to enable telnet as its the easiest method and gives you other functionality but out of interest here is another method.
Method 1
Use this method to configure a USB stick that when inserted into the Joggler and the device reboots it will add Telnet functionality
- Download either https://awooga.nl/stuff/telnet.zip or https://awooga.nl/stuff/telnet.tar
- Unpack the file downloaded to the root of a suitable usb stick formatted in vfat (Windows FAT16 or FAT32 doesnt seem to matter, but not all sticks work for some weird reason). All the below 4 files need to be present:
- .sum (beware that this file may be hidden from view on some operating systems)
- opupdt.run
- opupdt.tgz
- boothacks
- power down joggler
- insert usb stick
- power up joggler
- wait patiently
If the Joggler reboots, then it will have succesfully enabled telnet. You can remove the usb stick. If it doesn’t reboot, then either telnet is already enabled, or the usb stick is not recognised. In that case you need to start from step 2, but change to another stick 🙂
Method 2
This describes, how you get permanent telnet access working on your device:
- UnRAR the archive File:Telnet.rar to your USB stick. The Joggler does not accept all sticks, so you might try several..
- When you see the o2-Screen-Menu, you should be able to login using telnet. Both wlan und lan will work. Telnet your IP Adress and you should see to login prompt. Type “letmein” and press Enter. You can use “telnet YOUR_IP” in linux or programs such as “putty” for windows.
- When you have a working login, comment out the lines 13,14,15 and 17 in the file
/etc/init.d/boot.d/S56boot.daemons - reboot to see if it works
Advice
When you start vi, you can press “i” to get into insert mode. Go to the specified lines (with the arrow keys) and type “#” at the beginning of these four lines.
It should now look like this:
Code:
startdaemons()
{
echo ${n} “Starting daemons: ” ${c}
# if [ `nvram -sr net.login`x = “NO”x ] ; then
# echo ${n} ” (skipping telnet) “
# else
telnetd
# fi
echo “done”
}
When having done, press ESCAPE, then enter “:w” to write changes and “:q” to quit.
Bits and Pieces
Recovering an unbootable Joggler
Before you do any of this, it is essential that you have a working usbstick with an efi partition and a working OS with all drivers.
If something you do leaves the Joggler in a non-booting state (i.e. stuck on O2/OpenPeak screen) take the following steps:
- Don’t Panic
- Attach keyboard and known good usb stick, and apply power to the Joggler
- Press escape frantically (oh yes just like the good ol’ days)
- Once the num-lock key has lit, press escape a few more times. The process has worked if the numlock/caps lock key switches on and off when you press the appropriate key.
- type the following: fs1:boot and press enter. You are typing blind thanks to the jogglers boot screen.
- If it doesn’t boot the USB stick repeat the whole process.
- It it doesn’t work repeat the whole process but type fs0:boot and press enter.
The reason for step 7 is that if you (or the joggler) has wiped the partition table of the mmc, then it is not seen as a file system, and the usb stick becomes fs0.
Flash Layout
Out of the factory the flash inside the Joggler looks like so: (output of fdisk -l /dev/mmcblk0)
Disk /dev/mmcblk0: 1028 MB, 1028128768 bytes
4 heads, 16 sectors/track, 31376 cylinders
Units = cylinders of 64 * 512 = 32768 bytes
Disk identifier: 0x00000000
Device Boot Start End Blocks Id System
/dev/mmcblk0p1 * 1 1954 62520 ef EFI (FAT-12/16/32)
/dev/mmcblk0p2 1955 9768 250048 83 Linux
/dev/mmcblk0p3 9769 17582 250048 83 Linux
/dev/mmcblk0p4 17583 31376 441408 83 Linux
My first handy hint is DO NOT CHANGE the size of the first partition. Every time I changed the size, on the next reboot the Joggler wiped the partition table. YMMV.
As I didn’t want to struggle to fit the various file systems in the 3 partitions I changed the partition structure so it looked like this:
Disk /dev/mmcblk0: 1028 MB, 1028128768 bytes
4 heads, 16 sectors/track, 31376 cylinders
Units = cylinders of 64 * 512 = 32768 bytes
Disk identifier: 0x5213f7df
Device Boot Start End Blocks Id System
/dev/mmcblk0p1 * 1 1954 62520 ef EFI (FAT-12/16/32)
/dev/mmcblk0p2 1955 31376 941504 83 Linux
EFI Partition
To build my EFI partition I mounted the existing one (mount /dev/mmcblk0p1 /mnt/mount), and copied the files from my working usb stick EFI partition over, leave the existing ‘startup.nsh’ in place. The layout of your files may vary, but you need to edit grub.cfg (which if are using a recent usb stick image will be in /mnt/mount/grub.cfg if you used the mount command detailed).
It would probably look something like:
set timeout=0
menuentry "USB" {
set root=(hd0,1)
linux /vmlinuz-2.6.32 root=/dev/sda2 ro acpi=force idle=halt
initrd /initrd-2.6.32
}
Assuming that the other entries are correct you need to change ‘root=/dev/sda2’ so it becomes ‘root=/dev/mmcblk0p2’ (/dev/mmcblk0p2 is the second partition on the internal flash).
You might also need to double check the boot.nsh script and modify this to be “fs0: grub”, rather than “fs1: grub”.
Linux Partition
To fill this generous space I built an emdebian grip squeeze image, which is basically the next release of debian (squeeze) with a light grip applied. This removes a lot of the docs, man pages etc, and drastically reduces the size of the installation. With an lxde X11 setup with mplayer, samba, and all the other tools I need for my Joggler, df -k looks like this:
Filesystem 1K-blocks Used Available Use% Mounted on
/dev/mmcblk0p2 926680 477064 402544 55% /
tmpfs 255436 4 255432 1% /lib/init/rw
udev 10240 88 10152 1% /dev
tmpfs 255436 0 255436 0% /dev/shm
So plenty of room for further expansion, my photos being displayed from my server, no unsightly usb stick and an empty usb slot.
Assuming you copy your image from a usb stick to the internal flash, to get your image to work when you boot off internal, you will need to edit /etc/fstab
There will be a line like:
/dev/sda2 / ext3 errors=remount-ro,relatime 0 1
(if you use UUID, then you are on your own as I have no clue about them) Again, you need to change the sda2 to mmcblk0p2.
Issues
I am getting lots of ‘mmc2: Too large timeout requested!’ errors in syslog/dmesg. Google has provided some clues but I haven’t managed to track it down yet, although it doesn’t seem to cause problems.
Credit: Thanks to STSkeeps blog for the escape boot method, and the grub loader.
Disclaimer: You attempt the above modifications at your own risk. They haven’t appeared to damage either of my Jogglers that doesn’t mean yours won’t be hosed.
Edit Menus
There appears to be 2 menus in the default OS that are configurable. Most add ons will add to
/media/appshop
The default icons are configured
/openpeak/gui/o2-applications.xml
Creating Joggler Applications
https://knolleary.net/2010/05/31/creating-joggler-applications-under-linux/