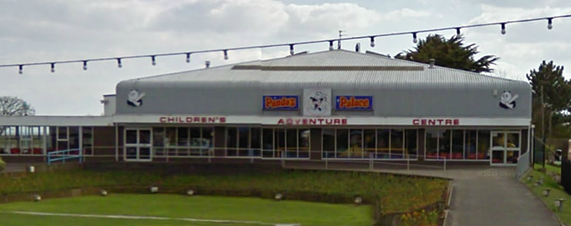
I purchased this Sega Rally Championship Twin cabinet from an indoor playpark that was closing down in Skegness.
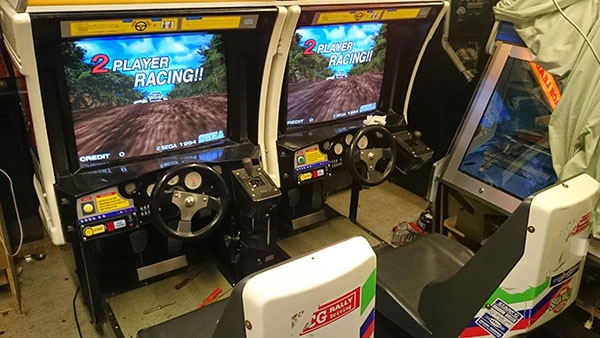
This is the first pic of the machine after I got it back and after a few basic checks powered it up.
Initial tests seemed to identify a few issues these were
General
- Screen Burn on both monitors
- One bulb in top header blown
- System Fans clogged with dust
- Whole system covered in years of dust and crap
Left hand cabinet
- Seat is stiff to slide
- Brake Pedal non functional
- Top plastic gear level insert smashed
Right Hand cabinet
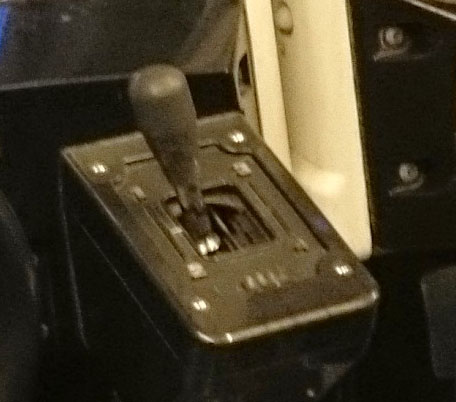
- Gear stick non functional
Over the next few nights I started to work on it when I could get time
Brake Pedal Fix
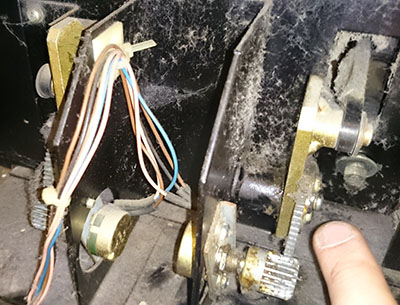
Opening up the access hatch on the rear of the cabinet I could see that the cogs that connected the brake pedal to the analogue spinner were not connecting. On closer inspection the whole mechanism was loose and wouldn’t have taken the strain of use. A washer was added to the screw shown in the picture to all the screw to be tightened and make the whole structure more rigid. After that the big cog connected to the spinner was moved into position to allow it to mesh with the cog on the brake pedal. Initially I had set the spinner to partially on so when I tested the car went slow due to the brake being applied at rest. The input test menu also confirmed this. I loosed the cog off again, turned the spinner down and then re-connected it back up.
Gear Lever Fix
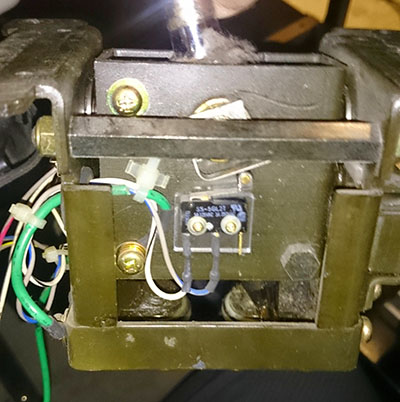
One of the gear levers was not registering at all. The cabinet has security torque screws so had to order some new bits to get into the gear lever. Once in I could see three wires had been severed on once side. I repaired these and this improved things. I was able to select gears 1,3 and 4 but not 2. After further investigation is was found that another wire had a break internally. This wire was also replaced. In the picture below the wire that was causing the issue was the blue and white one. Where it goes through the cable tie was where the break was. This was also where the break was on the other side. The continuous movement of the lever over time seems to put stress at this point on those wires.
The other repair was the cover that was smashed on the picture below.
This is a very thing piece of plastic with a hole in the middle for the level and a slit that goes from the hole to the edge to allow you to get it around the lever. I looked around for something suitable and found a black ice cream tub. Using the good one from the other side as a template I cut out the bottom of the tub. The forming circle on the bottom was an exact size for the hole. I used a dremmel to tidy up the circle and then cut a slit. Time will tell how long it lasts but for now it looks good enough.
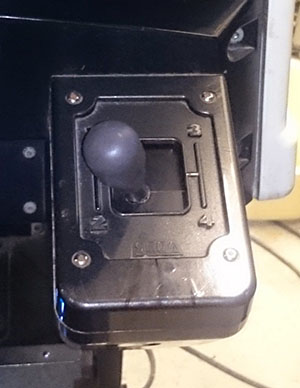
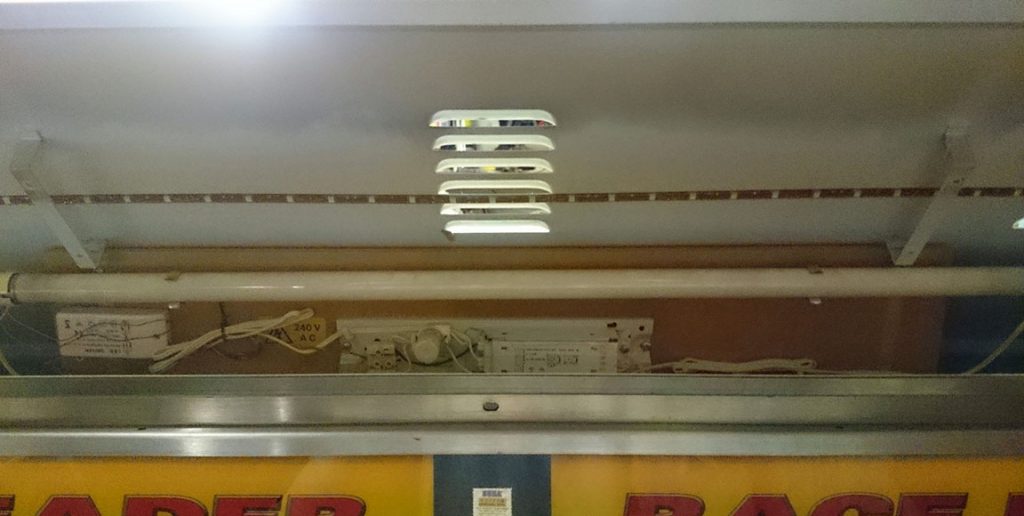
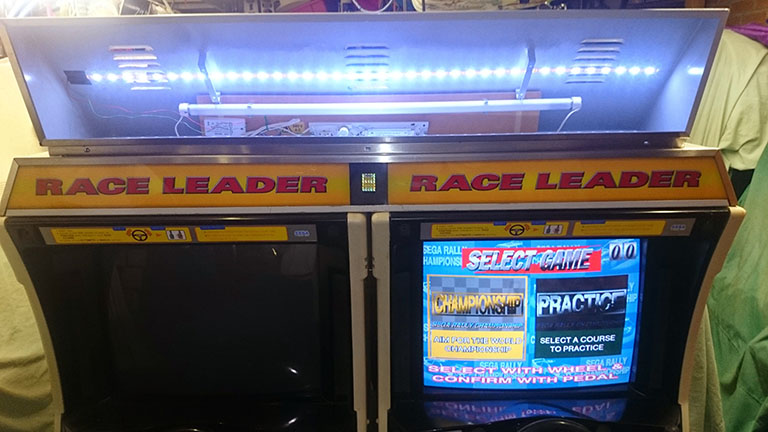
After a bit of playing I noticed that the gear lever on the right hand side was a bit loose in gears three and four. It was worst in gear 3 as it would fall down into neutral sometimes. After stripping the gear down you could see that the rubber seals that the bottom of the gear level follows had been bent, probably by some guerrilla where it was previously. After bending the frame back and putting it back together the gear was equally stiff on both sides and felt a lot better. Top Box Light Fix One of the bulbs had gone in the top box for the race leader signs. After looking at the bulb it seemed to need a 110V spot, screw in type size E17, 30 watts. After looking round these bulbs seemed hard to source. So as an alternative I brought some adapters to change the size from e17 to e27 to give me more choice of bulbs. Into this I went for an LED bulb to hopefully last a bit longer than a standard bulb and not use as much power. You can see a new bulb at the top of the picture. Note… since doing this I saw someone post in a forum that you could just use a 240v bulb and double up on the wattage. The other issue I had was that the florescent bulb had gone. Rather than replace it I thought I would try and change it to an LED strip as I had some bits spare. I took the 240v feed that went into the florescent bulb and put it in an LED driver. Then just ran 2 wires to the LED strip and soldered them on. I left the florescent connectors in case I ever wanted to change it back. I stuck the LED strip directly to the back of the metal top box.
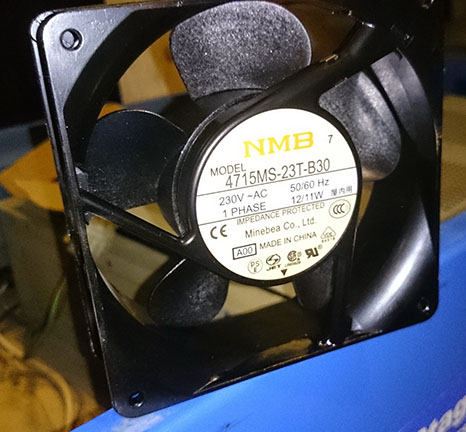
Fans I learnt this lesson the hard way. During a driving session one hot night one of the cabs started to glitz, a few seconds later it crashed and then wouldn’t power on again. After swapping boards between the two cabinets I narrowed it down to the CPU board. It had overheated and killed two of the memory chips. The board had to go off for repair. I knew the case fan was knackered but it turned out the cab fan had also failed causing it to overheat. Whilst the board was off for repair I replace the cab fans at the back under the seat with these. TheY fitted perfectly.

Processor board came back from repair and it now boots but there were also graphics issues. Looks like the fan failure caused both the processor board and graphics board to fail Monitor Arcing Ever since I had the cab one of the monitors was making an arcing sound when it turned on. This has been getting steadily worse over time so had a look at it today.
I discharged the monitor and removed the anode with the aim to clean it but what should of been a fairly easy process turned into a bit of a nightmare. A small metal disc fell out of the cap and went into the neck of the tube. I tried for ages to get it out but wasnt able to, the only way it was going to come out was to turn the monitor upside down. Had to strip most of the cab to remove the monitor, once it was out though and upside down the disc came out fairly easy.
I used an isopropyl alcohol cleaner to clean the cap and all around it and then re-seated it. I plan to get some high voltage silicone grease next week to finish the job. Powered it up for a quick test after the cleaning and no sign of arcing.
No Responses